

Table of Contents
Comfort Right Down to your Fingertips!
Last October, I had the great pleasure of testing the outstanding BMW R 18 (here’s why I refer to this bike as a real beast). Among its many qualities that impressed me, I particularly appreciated the heated grips. This was my first time getting a taste of this accessory, which seemed relatively frivolous to me at the time. But it quickly became clear that I would no longer be able to live without them. Riding in late October, without freezing my fingers, was truly delightful. I promised myself that I’d install heated grips on my Kawasaki Vulcan S before the start of the next season. In this article, I explain how I did it.
Choosing your Grips
As with most motorcycle accessories, there is a wide range of heated grips to suit all tastes and at budgets. You don’t have to break the bank to get good quality grips. Plus, by installing them yourself, you’ll also save on labor. I’ve received quotes up to several hundred dollars to have heated handles professionally installed. The total bill for my beloved handles: $100 (and several drops of sweat). Take the time to shop around; your local accessory stores will surely have something for you!
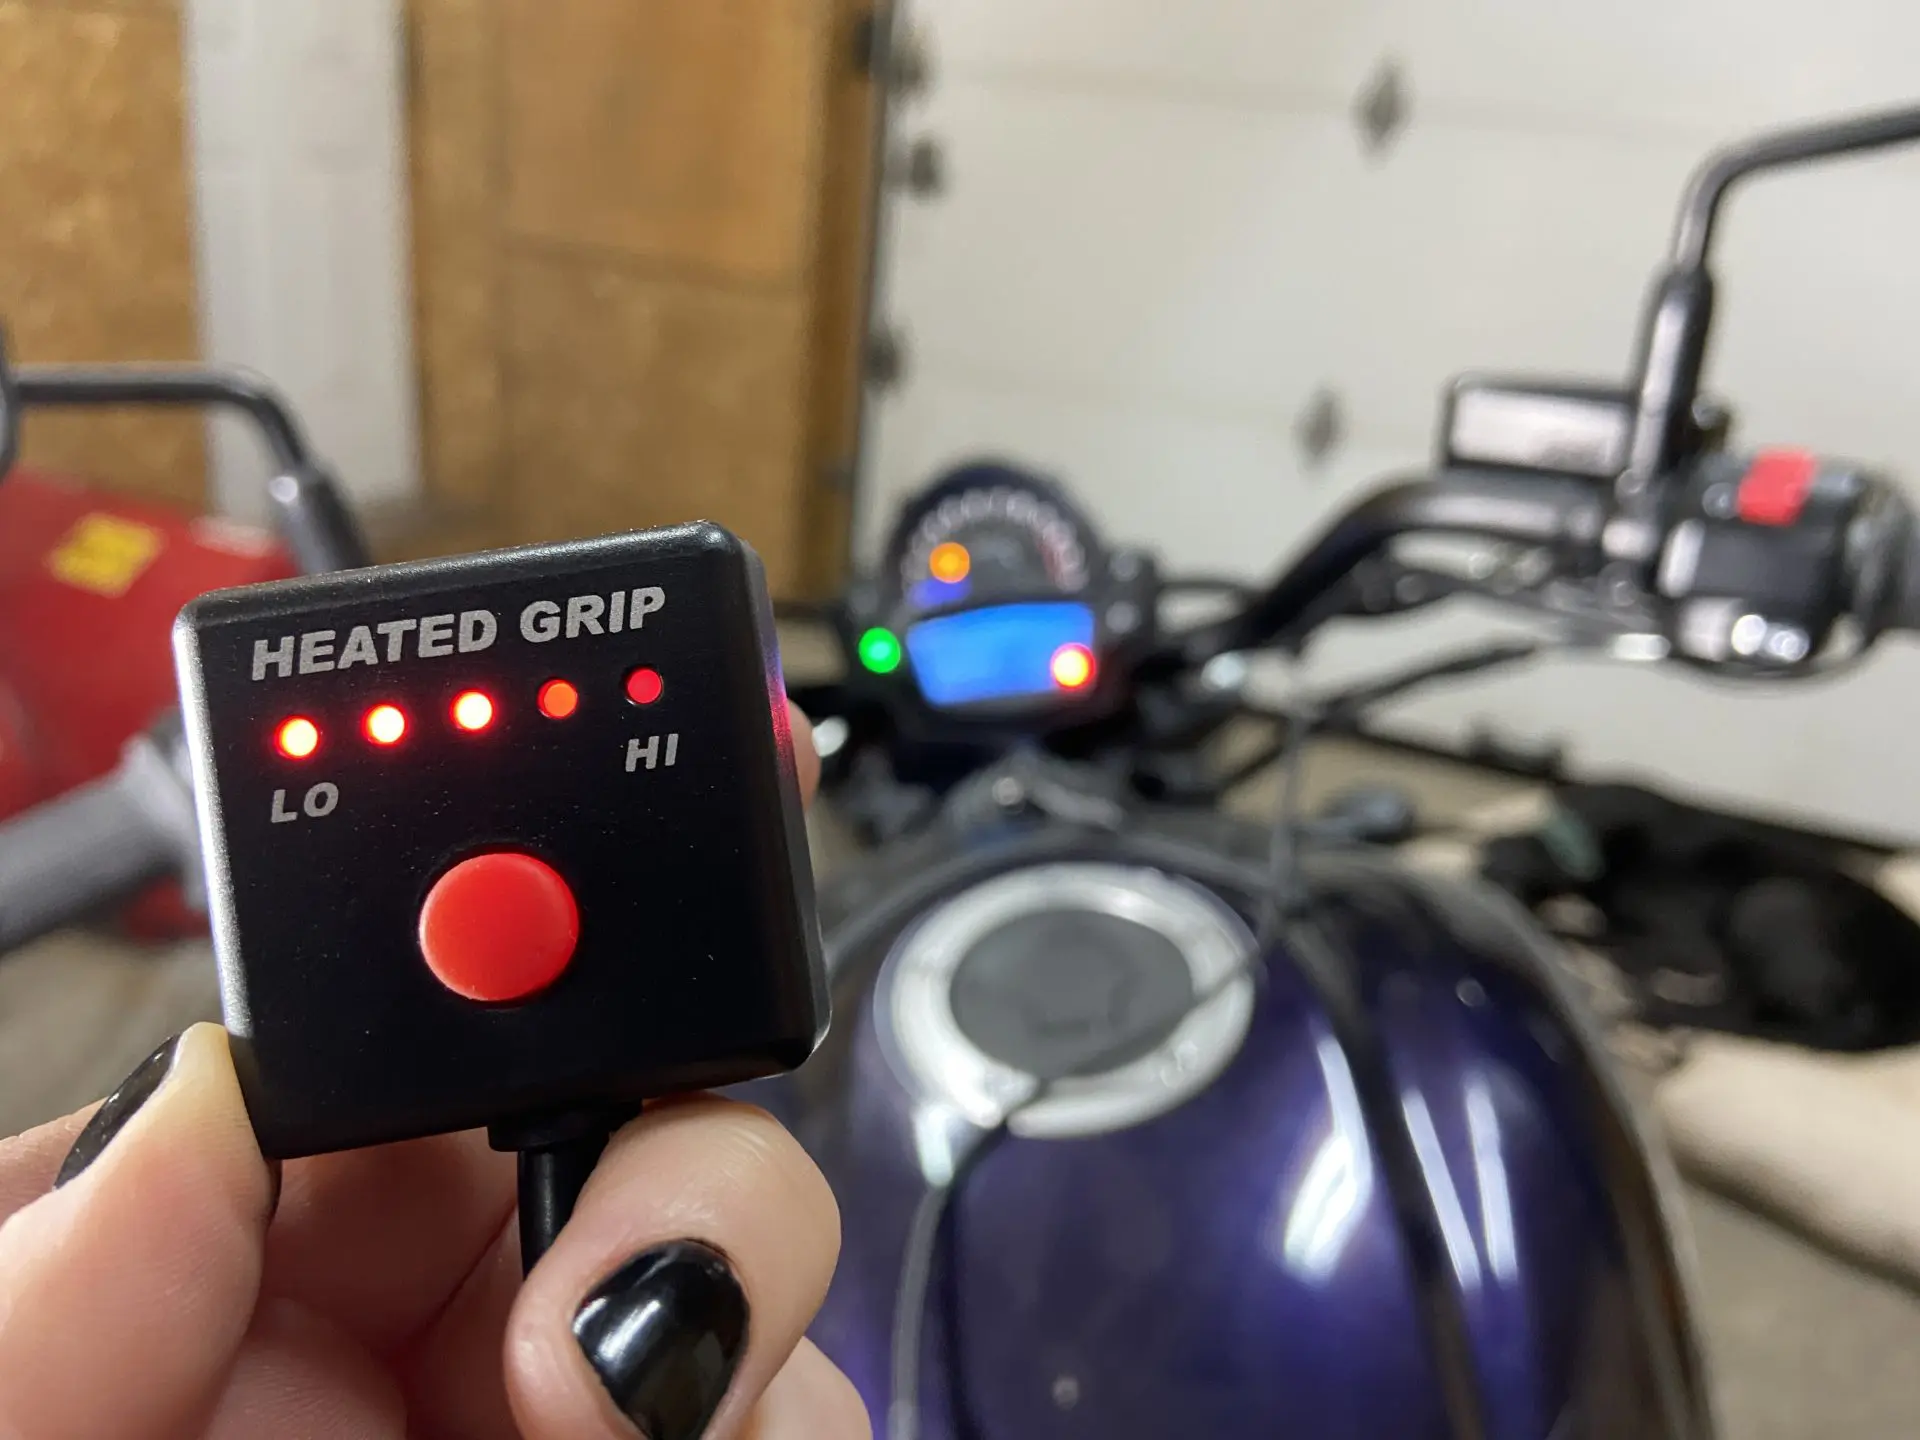
When choosing, simply go with your taste. There are various heat control mechanisms out there. For example, some operate with a lever on the handle, while others (like mine) are adjustable with a button on a separate remote control. Beware: some handles only have an on/off button, so they don’t offer the option to choose the power level.
Another aspect to consider is the look and feel of the handle in your hand. I have a preference for handles with a lot of grip: not only do I think they look nice, but I also feel they give me a better sense of control and are more comfortable. Other people prefer a smoother style. It’s really up to you!
Most importantly, make sure you get the right size! Check your bike’s specifications to identify the size of it handlebars. If you can’t find these specs, you can always measure the diameter of your handlebars with a tape measure. Most handlebars are 7/8, 1 and 11/4 inches in diameter.
Equipement
Here’s what you’ll need:
- a set of Allen keys;
- sandpaper;
- Krazy Glue (a tube was already included in the package when I bought my handles)
- a screwdriver;
- black tie wraps;
- a diagonal cutter;
- WD-40.

Steps
1. Remove the grips
Start by removing the handlebar ends with an Allen key.


To remove the handles, you’ll need to insert a screwdriver between the grip and the handle to loosen it.

WD-40 will be your best friend at this stage: spray it liberally under the handle. The lubricant will help dislodge it.

2. Sand the handlebars.
Using the sandpaper, roughen the handle. This will ensure that your grips will be securely attached to your handlebars, as glue adheres better to porous surfaces than smooth ones.


3. Install your new grips.
First, be sure to identify the left and right handlebars. The one on the throttle side will have a larger hole to accommodate the moving portion of the handlebar.

Second, it is important to plan the angle at which you’ll be installing the handles, so that the wires wind up in the right place. Look at where you will want to run the wires later before you install the handles.
Put glue on the end of the handlebar. Be careful not to go more than a few centimetres from the end (I was aiming for about halfway down the handle), as you don’t want the glue to run between the handle and the other handlebar hardware.

Hurry up and install the handle. I repeat: you will have to work very quickly, because the glue dries at the speed of light! I strongly recommend that you ask a friend to help you hold the bike at this stage. You will have to push very hard while turning the handle, and you’ll appreciate having someone on the other side of the bike to make sure you don’t tip your motorcycle over.
If you fail on your first attempt, don’t panic! Simply pick up your screwdriver and WD-40 and go back to step #1.

Now do the same thing on the other side.


There will be a gap between the handle and other handlebar accessories, especially on the throttle side. This is normal, and very important, even.


4. Put the handlebar ends back into place.

If, like me, you have dropped your poor motorcycle in the past, take this opportunity to give the bar ends a little love with some black nail polish on the tips, to hide the scars of your blunder!
5. Plug the wires.
Connect the wiring to your battery according to the instructions of the handles.

Plug in the wires.

6. Test your new grips.
Before moving on to the next step, I recommend testing your handles to make sure they work properly. If you need to exchange them, you’ll be glad you didn’t wait until the final stage of installation to find out!

7. Install the temperature control mechanism.
If, like me, your grips come with a separate remote control, install it in a spot that is aesthetically pleasing but, more importantly, that is convenient and safe. The left side of the handlebars is best, as this will prevent you from having to release the throttle to adjust the heat level of your grips while riding.


8. Place the wires.
Now it’s time to plan where the wires will run so that they are as invisible as possible. Follow the existing wires; this will guide you. Be sure to leave enough slack on the throttle side so that the wire can follow the movement of the handle as you turn it!

Use the tie wraps to secure the wires in place. As much as possible, stay away from essential tubing, such as your brake oil hose, so as to avoid blocking the flow of fluids. When you are satisfied with the placement of the wires, use the diagonal cutter to trim the excess off the fasteners.


That’s it!
There you have it, it’s that simple! No matter what kind of bike you have, if you don’t have heated grips yet, I strongly recommend that you get some. You’ll see: it will change your life, while also extending your riding season. You’ll thank me later!
3 Comments
Why replace when you can wrap/ advantagegripwraps.com
@Patrick… Really? Those things aren’t even heated grips. I can’t tell if this is a louse attempt to get people onto the website or you genuinely think this is a good alternative too a good set of grips…
Hee! Wat is precies het merk en maat van de grips die jij heb gekocht? Ik heb ook een vulcan s en wil dit graag zelf proberen. Tevens de vraag: was het moeilijk om de draden weg te werken bij deze fiets? Ik hoor het graag van je. Groetjes Joey